背景
Swagger 3.0 是 OpenAPI 规范体系下的重要版本,其前身是 Swagger 2.0。在 Swagger 2.0 之后,该规范正式更名为 OpenAPI 规范,并基于新的版本体系进行迭代,因此 Swagger 3.0 实际对应 OpenAPI 3.0 版本。这一版本着重强化了对 RESTful API 的标准化支持,通过更灵活且丰富的定义方式,不仅能实现 API 描述的规范化,还可高效驱动文档自动生成、客户端与服务器代码搭建,以及测试工具集成等全流程开发场景,成为现代 API 设计与管理的关键技术标准
依赖
springfox-boot-starter 已经不更新了,目前推荐使用的是 springdoc-openapi-ui 它集成了 swagger ui和 doc 接口文档生成工具,提供了更加强大和灵活的功能。
github:https://github.com/springdoc/springdoc-openapi
核心特性
- 自动生成 OpenAPI 文档
- 集成 Swagger UI 界面
- 支持注解配置 API 文档
spring boot 2.x 版本
<dependency><groupId>org.springdoc</groupId><artifactId>springdoc-openapi-ui</artifactId><version>1.7.0</version>
</dependency>
备注:适用于 Spring Boot 2.x 版本,基于旧版本的 Spring Boot 架构
spring boot 3.x 版本
<dependency><groupId>org.springdoc</groupId><artifactId>springdoc-openapi-starter-webmvc-ui</artifactId><version>2.2.0</version>
</dependency>
备注:适用于 Spring Boot 3.x 版本,使用了 Spring Boot 3 的新特性和架构,支持 Jakarta EE 而不是 Java EE
使用
依赖引入
springdoc-openapi-ui使用非常简单,全部使用注解即可完成,我这里例子是spring boot 2.7,所以引入 2.x 的依赖即可:
<dependency><groupId>org.springdoc</groupId><artifactId>springdoc-openapi-ui</artifactId><version>1.7.0</version>
</dependency>
主配置类
package com.example.config;import com.sun.tools.javac.util.List;
import io.swagger.v3.oas.models.OpenAPI;
import io.swagger.v3.oas.models.info.Info;
import io.swagger.v3.oas.models.servers.Server;
import org.springframework.context.annotation.Bean;
import org.springframework.context.annotation.Configuration;@Configuration
public class SwaggerOpenApiConfig {@Beanpublic OpenAPI customOpenAPI() {return new OpenAPI().info(new Info().title("k8s-spring-boot-demo api").description("k8s-spring-boot-demo api").version("v1.0.0")).servers(List.of(new Server().url("http://localhost:9999").description("IP1访问链接"),new Server().url("https://192.168.xxx.107.com").description("IP2访问链接")));}}
实体类配置
这里的实体就是你接口 contorller 返回的对象,可以给加上注释
package com.example.bo;
import com.example.enumbean.ResultEnum;
import io.swagger.v3.oas.annotations.media.Schema;
import lombok.Getter;import java.text.MessageFormat;@Schema(description = "结果包装类")
@Getter
public class Result<T> {@Schema(description = "响应状态", example = "true", required = true)private Boolean success = true;@Schema(description = "状态码", example = "200")private Integer code=200;@Schema(description = "消息", example = "执行成功")private String msg;@Schema(description = "结果集合")private T results;public Result() {}private Result(ResultEnum status) {if (status != null) {this.code = status.getCode();this.msg = status.getMsg();}}public static <T> Result<T> success(T data) {return new Result().setResults(data);}public static Result error(ResultEnum status) {return new Result(status).setSuccess(false);}public static Result error(int code, String message) {return new Result().setCode(code).setMsg(message).setSuccess(false);}public static Result errorWithArgs(ResultEnum status, Object... args) {return new Result(status).setMsg(MessageFormat.format(status.getMsg(), args)).setSuccess(false);}public Result<T> setCode(Integer code) {this.code = code;return this;}public Result<T> setMsg(String msg) {this.msg = msg;return this;}public Result<T> setResults(T results) {this.results = results;return this;}public Result<T>  setSuccess(Boolean success) {this.success = success;return this;}@Overridepublic String toString() {return "Result{" +"code=" + code +", msg='" + msg + '\'' +", results=" + results +", success=" + success +'}';}
}
Controller 类配置
这里其实不是必须的,只要引入了springdoc的依赖,默认就会自动识别所有的controller,只不过不加下面的注解说明,就没法解释这个接口每个参数的类型,作用,是否可选,注意事项,以及响应结果的类型,正确/错误的状态码说明等,如果是大型的多人参与的项目或者开源项目,建议还是加一下。
package com.example.controller;import com.example.bo.Result;
import io.swagger.v3.oas.annotations.responses.ApiResponse;
import io.swagger.v3.oas.annotations.responses.ApiResponses;
import lombok.extern.slf4j.Slf4j;
import org.springframework.http.MediaType;
import org.springframework.http.ResponseEntity;
import org.springframework.web.bind.annotation.*;import io.swagger.v3.oas.annotations.Operation;
import io.swagger.v3.oas.annotations.Parameter;
import io.swagger.v3.oas.annotations.Parameters;
import io.swagger.v3.oas.annotations.media.Schema;
import io.swagger.v3.oas.annotations.tags.Tag;import java.lang.management.BufferPoolMXBean;
import java.lang.management.ManagementFactory;
import java.nio.ByteBuffer;
import java.util.HashMap;
import java.util.List;
import java.util.Map;import org.springframework.web.servlet.mvc.method.annotation.ResponseBodyEmitter;
import org.springframework.web.servlet.mvc.method.annotation.SseEmitter;@Tag(name = "测试管理", description = "测试管理相关接口")
@RestController
@Slf4j
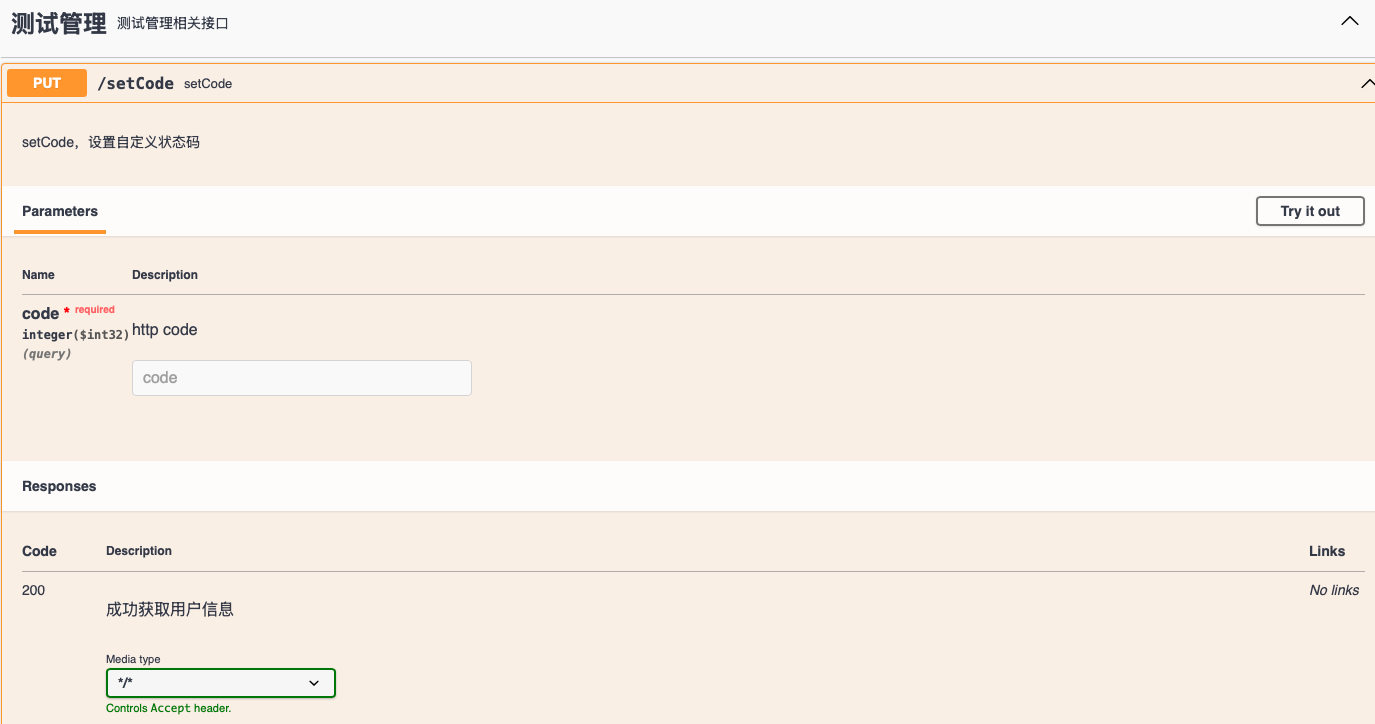
public class HealthController {private int code = 200;@Operation(summary = "check1", description = "check接口,打印当前内存占用")@GetMapping(value = "/check1")public ResponseEntity<String> check1(){log.info("check1 探活成功...");getMemoryRate();return ResponseEntity.ok("access success \n");}@Operation(summary = "setCode", description = "setCode,设置自定义状态码")@Parameters({@Parameter(name = "code", description = "http code", schema = @Schema(implementation = int.class, example = "500"))})@ApiResponses(value = {@ApiResponse(responseCode = "200", description = "成功获取用户信息"),@ApiResponse(responseCode = "404", description = "获取用户信息失败")})@PutMapping(value = "/setCode")public Result<String> setCode(int code){this.code = code;log.info("修改自定义状态码={}",code);return Result.success(String.format("setCode success %s",code));}}其他配置
在 spring boot 的 application.properties或者 yaml 里面增加:
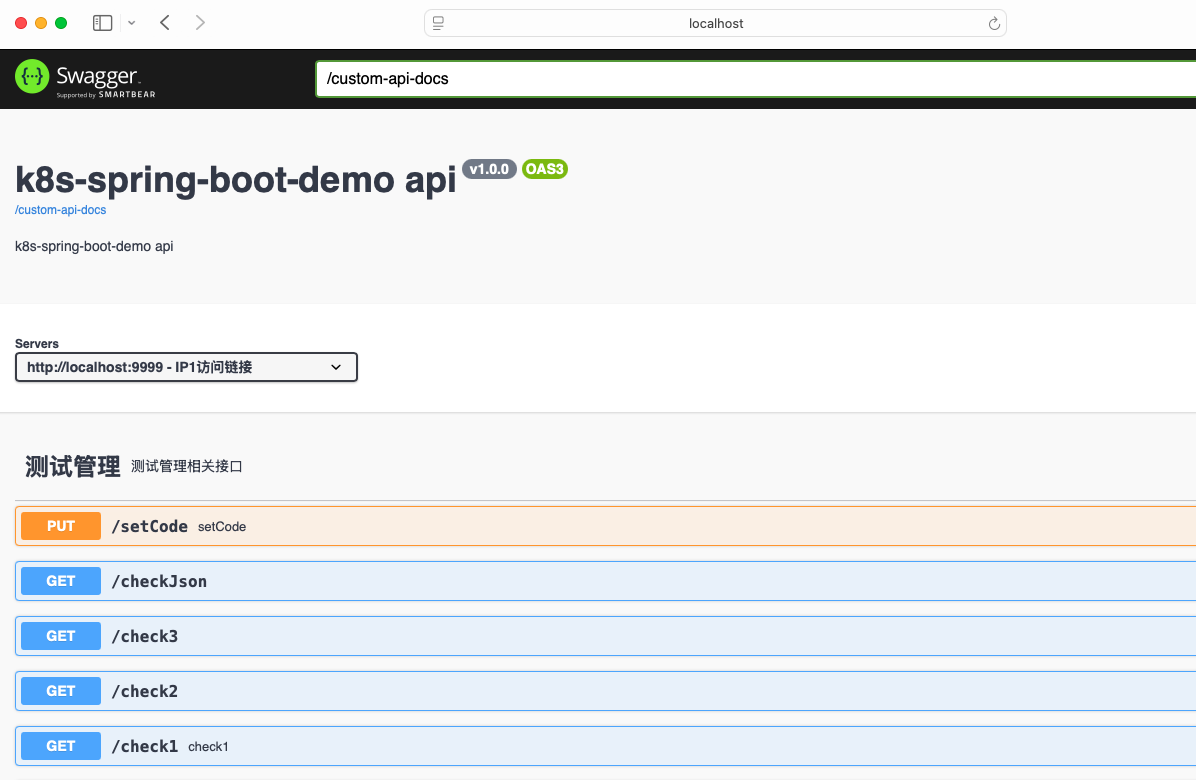
springdoc.api-docs.path=/custom-api-docs定义在 swagger ui 页面点击这个path,就可以导出所有接口的 json
查看文档
访问链接,注意如果配置了context-path,还需要加上context-path 前缀
http://localhost:9999/swagger-ui/index.html
效果:
总结
Swagger等API文档工具通过自动化、标准化的方式解决了API开发中的文档维护问题,提高了开发效率和协作质量,在实际应用场景如微服务架构中服务间接口定义,前后端分离项目的接口协作,对外提供API的产品或平台,大型团队的内部系统开发,已成为现代软件开发中不可或缺的工具


