文章目录
- QVBoxLayOut
- 代码创建
- 图形化创建
- QHBoxLayout
- 布局管理器嵌套
- QGridLayout
- 代码示例
- 拉伸系数
- QFormLayout
- QSpacerItem
QVBoxLayOut
之前将控件放在界面上,都是通过手动的方式进行的,这种方式不精确,也无法对窗口大小进行自动识别。
Qt引入了布局管理器,具体控件的大小、位置不需要我们手动设置,自动帮我们算好了。
QVBoxLayOut表示垂直的布局管理器,V是vertical的缩写
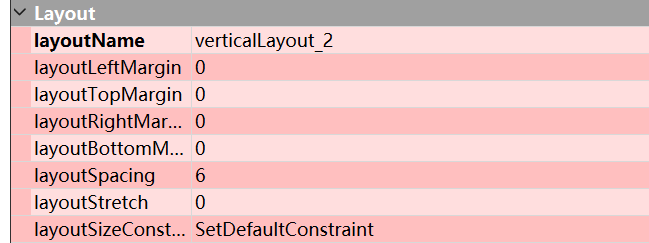
核心属性:
| 属性 | 说明 |
|---|---|
| layoutLeftMargin | 左侧边距 |
| layoutRightMargin | 右侧边距 |
| layoutTopMargin | 上方边距 |
| layoutButtonMargin | 下方边距 |
| layoutSpacing | 相邻元素直接的边距 |
Layout只是用于布局,并没有提供信号
代码创建
#include "widget.h"
#include "ui_widget.h"
#include<QPushButton>
#include<QVBoxLayout>
Widget::Widget(QWidget *parent): QWidget(parent), ui(new Ui::Widget)
{ui->setupUi(this);//创建3个按钮,采用布局管理器管理QPushButton *button1 = new QPushButton("按钮1");QPushButton *button2 = new QPushButton("按钮2");QPushButton *button3 = new QPushButton("按钮3");//创建布局管理器QVBoxLayout *layout = new QVBoxLayout();layout->addWidget(button1);layout->addWidget(button2);layout->addWidget(button3);this->setLayout(layout);
}Widget::~Widget()
{delete ui;
}
这样就自动设置好了按钮的位置和大小。
图形化创建
上面一个widget只能设置一个布局管理器。
这图形化界面当中设置,发现可以创建2个布局管理器,但是如果调整窗口大小,这个并不会随着变化。
这是因为使用代码创建layout,其实只创建了一个layout;
如果在Qt Designer中创建的layout,是先创建了widget,然后再新的widget中添加了一个layout。
先拖拽控件,再layout:
这里也可以设置layout的一些属性:
QHBoxLayout
QHBoxLayout表示水平垂直的布局管理器
属性和QVBoxLayout一样,使用也是类似
#include "widget.h"
#include "ui_widget.h"
#include<QPushButton>
#include<QHBoxLayout>
Widget::Widget(QWidget *parent): QWidget(parent), ui(new Ui::Widget)
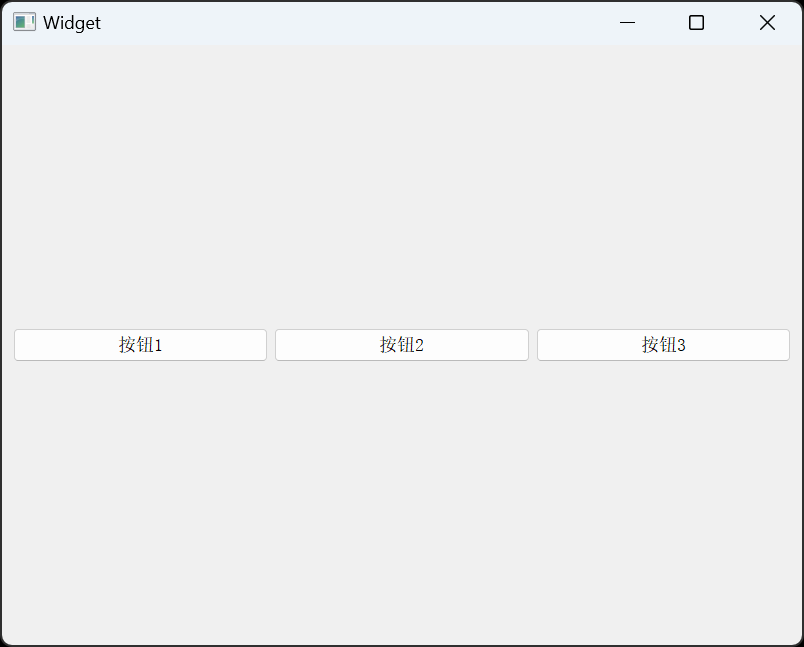
{ui->setupUi(this);QPushButton* button1 = new QPushButton("按钮1");QPushButton* button2 = new QPushButton("按钮2");QPushButton* button3 = new QPushButton("按钮3");QHBoxLayout* layout = new QHBoxLayout(this);layout->addWidget(button1);layout->addWidget(button2);layout->addWidget(button3);
}Widget::~Widget()
{delete ui;
}
布局管理器嵌套
#include "widget.h"
#include "ui_widget.h"
#include<QPushButton>
#include<QHBoxLayout>
#include<QVBoxLayout>
Widget::Widget(QWidget *parent): QWidget(parent), ui(new Ui::Widget)
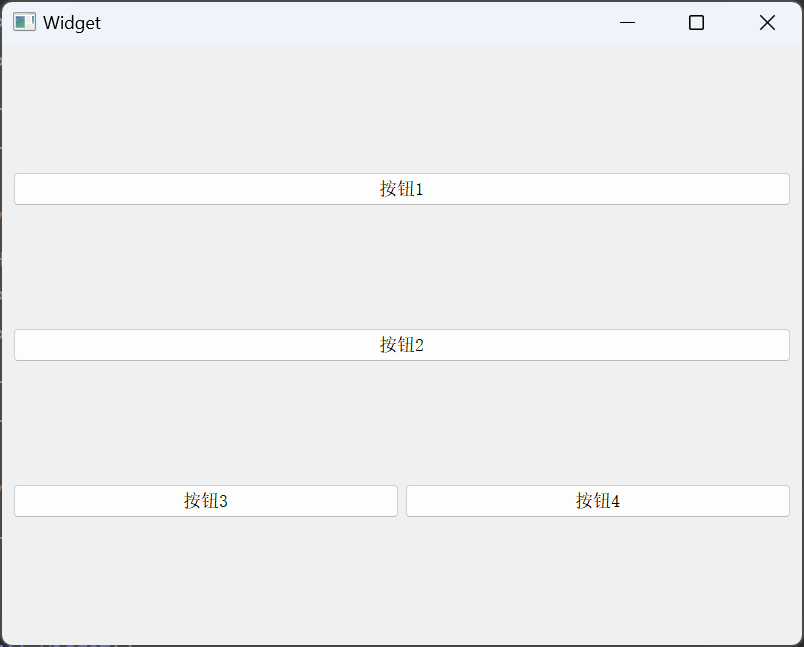
{ui->setupUi(this);//创建垂直布局管理器QVBoxLayout* vLayout = new QVBoxLayout();this->setLayout(vLayout);//添加按钮QPushButton* button1 = new QPushButton("按钮1");QPushButton* button2 = new QPushButton("按钮2");vLayout->addWidget(button1);vLayout->addWidget(button2);//创建水平布局管理器QHBoxLayout* hLayout = new QHBoxLayout();QPushButton* button3 = new QPushButton("按钮3");QPushButton* button4 = new QPushButton("按钮4");hLayout->addWidget(button3);hLayout->addWidget(button4);//水平布局管理器添加到垂直vLayout->addLayout(hLayout);
}Widget::~Widget()
{delete ui;
}
QGridLayout
QGridLayout用来实现网格布局的效果,可以达到n*m这种网格的效果
核心属性:
| 属性 | 说明 |
|---|---|
| layoutLeftMargin | 左侧边距 |
| layoutRightMargin | 右侧边距 |
| layoutTopMargin | 上方边距 |
| layoutButtonMargin | 下方边距 |
| layoutHorizontalSpacing | 相邻元素之间的水平方向的间距 |
| layoutVerticalSpacing | 相邻元素之间垂直方向的间距 |
| layoutRowStretch | 行方向的拉伸系数 |
| layoutColunmStretch | 列方向的拉伸系数 |
代码示例
#include "widget.h"
#include "ui_widget.h"
#include<QPushButton>
#include<QGridLayout>
Widget::Widget(QWidget *parent): QWidget(parent), ui(new Ui::Widget)
{ui->setupUi(this);QPushButton* button1 = new QPushButton("按钮1");QPushButton* button2 = new QPushButton("按钮2");QPushButton* button3 = new QPushButton("按钮3");QPushButton* button4 = new QPushButton("按钮4");QPushButton* button5 = new QPushButton("按钮5");QPushButton* button6 = new QPushButton("按钮6");QPushButton* button7 = new QPushButton("按钮7");QPushButton* button8 = new QPushButton("按钮8");QGridLayout* layout = new QGridLayout();layout->addWidget(button1, 0, 0);layout->addWidget(button2, 0, 1);layout->addWidget(button3, 0, 2);layout->addWidget(button4, 0, 4);layout->addWidget(button5, 1, 0);layout->addWidget(button6, 1, 1);layout->addWidget(button7, 3, 1);layout->addWidget(button8, 4, 0);this->setLayout(layout);
}Widget::~Widget()
{delete ui;
}
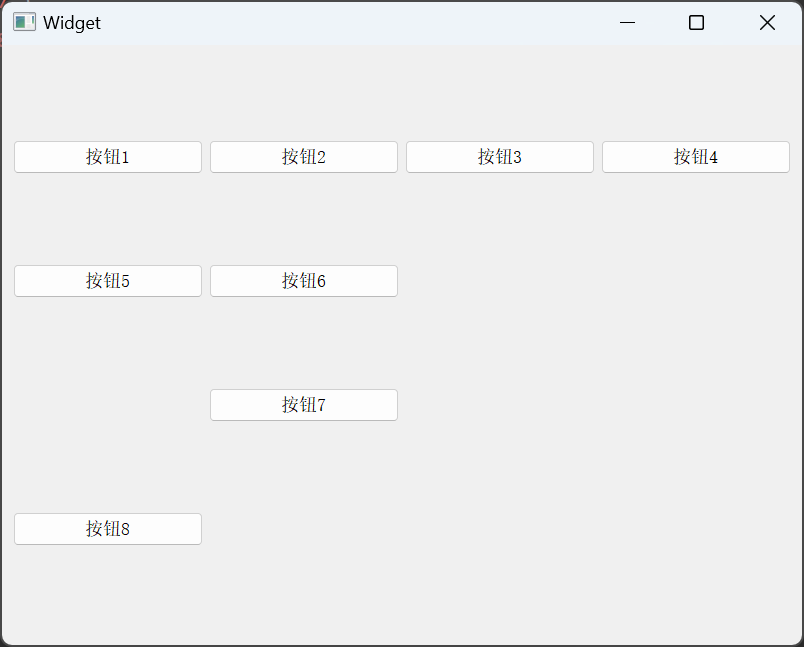
**Tips:**这里设置的行数和列数,只是用来决定控件之间的相对位置
拉伸系数
上面创建的布局管理器,控件尺寸都是一样的,如果想实现不同的尺寸控件,可以通过拉伸系数设置控件尺寸的比例。
水平方向:
#include "widget.h"
#include "ui_widget.h"
#include<QPushButton>
#include<QGridLayout>
Widget::Widget(QWidget *parent): QWidget(parent), ui(new Ui::Widget)
{ui->setupUi(this);QPushButton* button1 = new QPushButton("按钮1");QPushButton* button2 = new QPushButton("按钮2");QPushButton* button3 = new QPushButton("按钮3");QPushButton* button4 = new QPushButton("按钮4");QPushButton* button5 = new QPushButton("按钮5");QPushButton* button6 = new QPushButton("按钮6");QGridLayout* layout = new QGridLayout();layout->addWidget(button1, 0, 0);layout->addWidget(button2, 0, 1);layout->addWidget(button3, 0, 2);layout->addWidget(button4, 1, 0);layout->addWidget(button5, 1, 1);layout->addWidget(button6, 1, 2);this->setLayout(layout);//设置水平方向的拉伸系数   按照1:1:2layout->setColumnStretch(0, 1);layout->setColumnStretch(1, 1);layout->setColumnStretch(2, 2);}Widget::~Widget()
{delete ui;
}
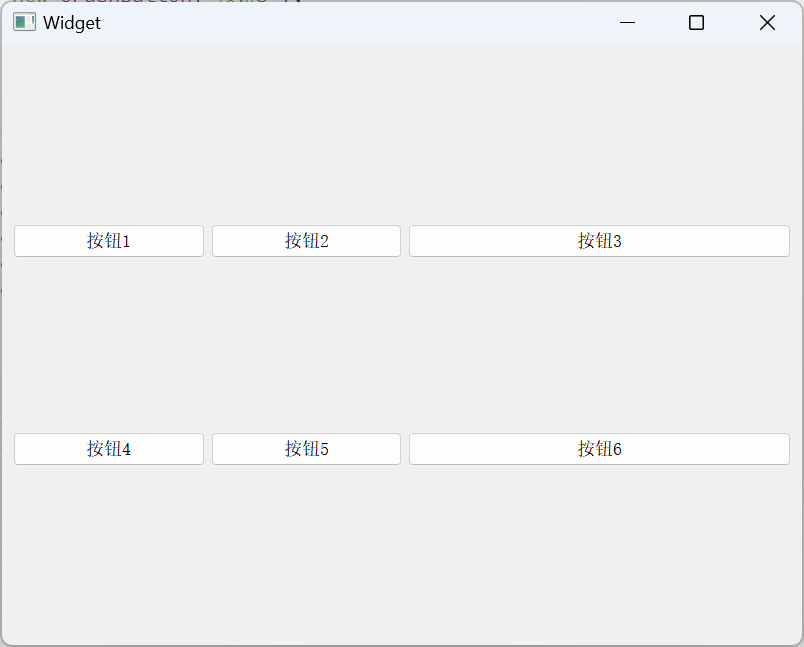
**Tips:**如果
layout->setColumnStretch(0, 0);第二个参数为0,表示不参与拉伸,一直都是固定尺寸。
垂直方向:
这里直接设置,是无效的,收到了SizePolicy的影响:
| 属性 | 说明 |
|---|---|
| QSizePolicy::Ignored | 忽略按钮的尺寸,不对布局产生影响 |
| QSizePolicy::Minimum | 控件的最小尺寸固定在,布局时不会小于该值 |
| QSizePolicy::Maximum | 控件的最大尺寸固定值,布局时不会大于该值 |
| QSizePolicy::Preferred | 控件的理想尺寸为固定值,布局时会尽量接近该值 |
| QSizePolicy::Expanding | 控件的尺寸可以根据控件调整,尽可能占据空间 |
| QSizePolicy::Shrinking | 控件尺寸可以根据空间调整,尽可能缩小以适应空间 |
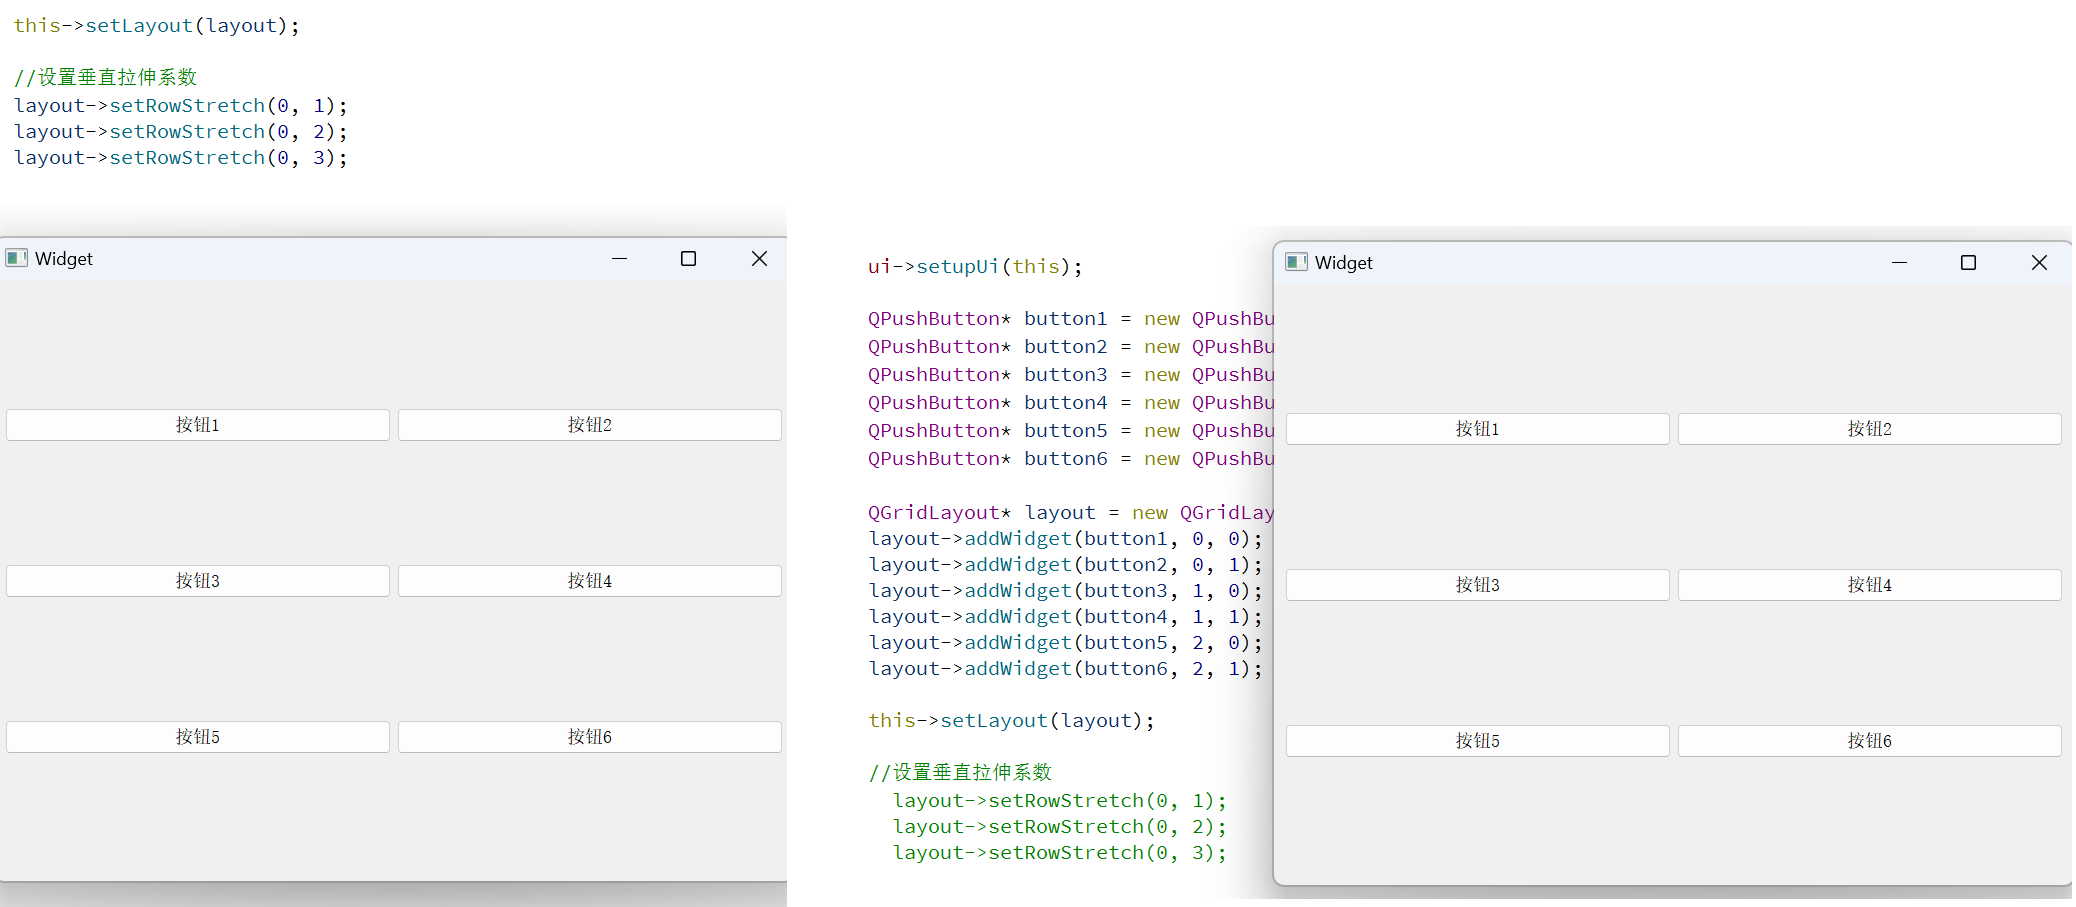
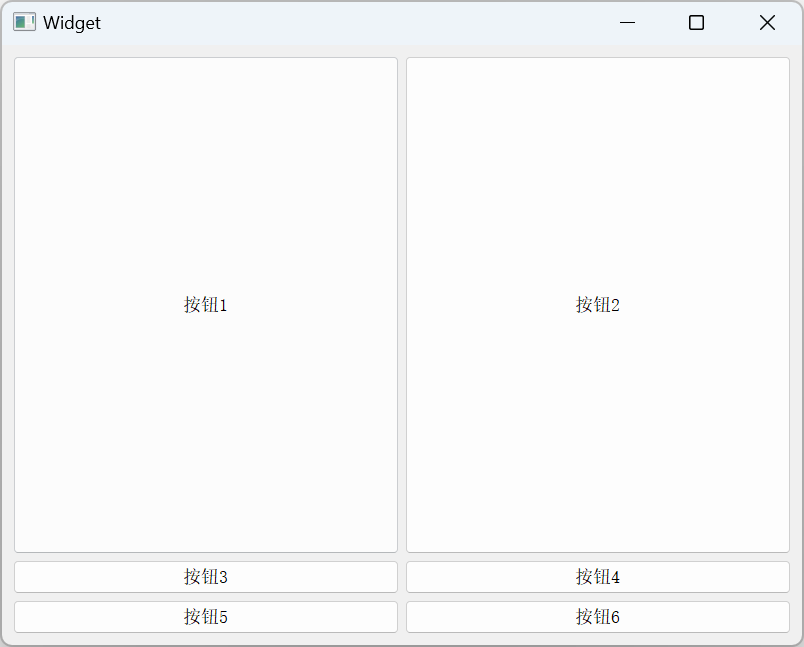
由于按钮的垂直方向默认没有拉伸开(水平方向默认拉伸),所以不会收到拉伸系数的影响,要想让垂直方向的拉伸系数生效,就就需要让按钮能够拉伸开
#include "widget.h"
#include "ui_widget.h"
#include<QPushButton>
#include<QGridLayout>
Widget::Widget(QWidget *parent): QWidget(parent), ui(new Ui::Widget)
{ui->setupUi(this);QPushButton* button1 = new QPushButton("按钮1");QPushButton* button2 = new QPushButton("按钮2");QPushButton* button3 = new QPushButton("按钮3");QPushButton* button4 = new QPushButton("按钮4");QPushButton* button5 = new QPushButton("按钮5");QPushButton* button6 = new QPushButton("按钮6");button1->setSizePolicy(QSizePolicy::Expanding, QSizePolicy::Expanding);button2->setSizePolicy(QSizePolicy::Expanding, QSizePolicy::Expanding);button3->setSizePolicy(QSizePolicy::Expanding, QSizePolicy::Expanding);button4->setSizePolicy(QSizePolicy::Expanding, QSizePolicy::Expanding);button5->setSizePolicy(QSizePolicy::Expanding, QSizePolicy::Expanding);button6->setSizePolicy(QSizePolicy::Expanding, QSizePolicy::Expanding);QGridLayout* layout = new QGridLayout();layout->addWidget(button1, 0, 0);layout->addWidget(button2, 0, 1);layout->addWidget(button3, 1, 0);layout->addWidget(button4, 1, 1);layout->addWidget(button5, 2, 0);layout->addWidget(button6, 2, 1);this->setLayout(layout);//设置垂直拉伸系数layout->setRowStretch(0, 1);layout->setRowStretch(0, 2);layout->setRowStretch(0, 3);}Widget::~Widget()
{delete ui;
}
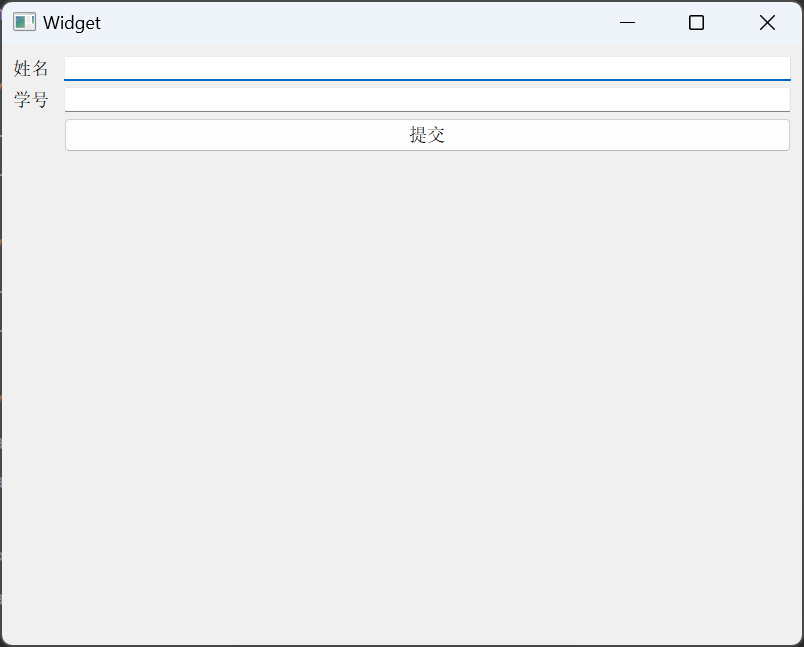
QFormLayout
QFormLayout叫做表单布局,属于QGridLayout的一种特殊情况。
它只有n行2列,可由于用户填表的场景
#include "widget.h"
#include "ui_widget.h"
#include<QFormLayout>
#include<QLabel>
#include<QLineEdit>
#include<QPushButton>
Widget::Widget(QWidget *parent): QWidget(parent), ui(new Ui::Widget)
{ui->setupUi(this);QFormLayout* layout = new QFormLayout();this->setLayout(layout);//创建2个label作为第一列QLabel* label1 = new QLabel("姓名");QLabel* label2 = new QLabel("学号 ");//创建2个输入框作为第二列QLineEdit* edit1 = new QLineEdit();QLineEdit* edit2 = new QLineEdit();//上述控件添加到表单layout->addRow(label1, edit1);layout->addRow(label2, edit2);QPushButton* button = new QPushButton("提交");layout->addRow(nullptr, button);
}Widget::~Widget()
{delete ui;
}
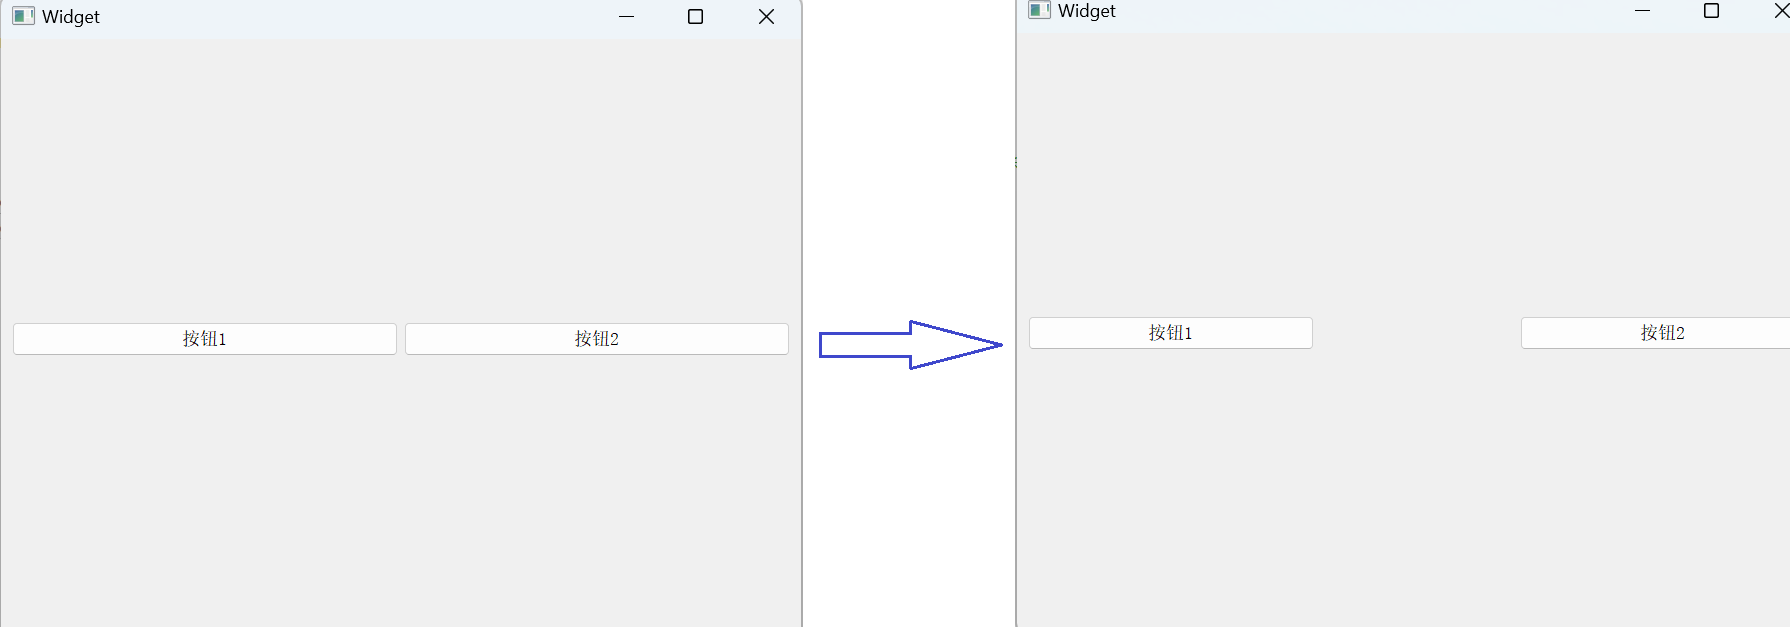
QSpacerItem
QSpacerItem不是布局管理器,但是可以搭配布局管理器使用,用来添加一段空白
| 属性 | 说明 |
|---|---|
| width | 宽度 |
| height | 高度 |
| hData | 水平方向的sizePolicy:QSizePolicy::Ignored:忽略按钮的尺寸,不对布局产生影响QSizePolicy::Minimum:控件的最小尺寸固定在,布局时不会小于该值QSizePolicy::Maximum:控件的最大尺寸固定值,布局时不会大于该值QSizePolicy::Preferred:控件的理想尺寸为固定值,布局时会尽量接近该值QSizePolicy::Expanding:控件的尺寸可以根据控件调整,尽可能占据空间QSizePolicy::Shrinking:控件尺寸可以根据空间调整,尽可能缩小以适应空间 |
| vDate | 垂直方向的sizePolicy,选项同上 |
简单示例:
#include "widget.h"
#include "ui_widget.h"
#include<QPushButton>
#include<QHBoxLayout>
Widget::Widget(QWidget *parent): QWidget(parent), ui(new Ui::Widget)
{ui->setupUi(this);QHBoxLayout* layout = new QHBoxLayout();this->setLayout(layout);QPushButton* button1 = new QPushButton("按钮1");QPushButton* button2 = new QPushButton("按钮2");//创建spacerQSpacerItem* spacer = new QSpacerItem(200, 20); //宽度和高度//如果想让空白在直接,添加的顺序就在中间layout->addWidget(button1);layout->addSpacerItem(spacer);layout->addWidget(button2);
}Widget::~Widget()
{delete ui;
}


?)
![[C#] Winform - 进程间通信(SendMessage篇)](http://pic.xiahunao.cn/nshx/[C#] Winform - 进程间通信(SendMessage篇))

