在 Vue.js 的开发世界里,单文件组件(Single File Components,简称 SFC)是构建复杂应用的基石。它将 HTML、CSS 和 JavaScript 代码封装在一个.vue文件中,极大地提高了代码的可维护性和复用性。
本文将深入探讨单文件组件中几个重要特性:VCA 语法糖、computed、watch、props 与 emit,以及 provide 和 inject 的使用。
一、VCA 语法糖:让代码更简洁优雅
VCA 是 Vue Composition API 的缩写,它是 Vue 3 推出的新特性,允许开发者以函数式的方式组织组件逻辑。在单文件组件中使用 VCA 语法糖,能让代码更加简洁直观。
在 Vue 3 的单文件组件中,我们可以直接在<script>标签内使用 VCA 语法糖,无需额外引入defineComponent。例如:
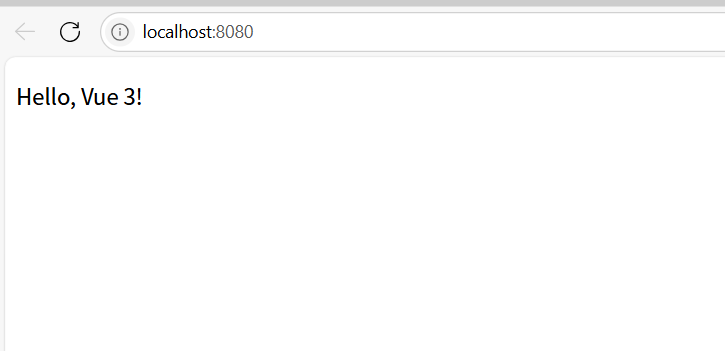
<template><div><p>{{ message }}</p></div>
</template><script setup>
import { ref } from 'vue';
const message = ref('Hello, Vue 3!');
</script>
在上述代码中,<script setup>就是 VCA 语法糖的体现。它自动进行了组件的定义,并且在该标签内声明的变量和函数可以直接在<template>中使用,无需额外返回。这种写法减少了样板代码,使代码更加简洁,逻辑更加清晰。
二、computed:高效的数据处理
computed 属性用于基于其他响应式数据计算派生数据。它具有缓存机制,只有当依赖的响应式数据发生变化时,才会重新计算。
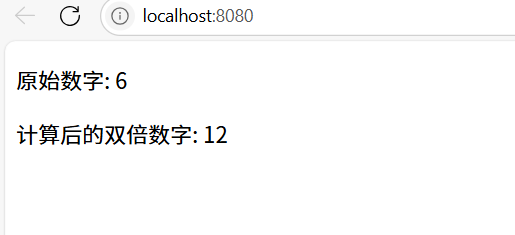
<template><div><p>原始数字: {{ num }}</p><p>计算后的双倍数字: {{ doubleNum }}</p></div>
</template><script setup>
import { ref, computed } from 'vue';
const num = ref(5);
const doubleNum = computed(() => num.value * 2);
</script>
在这个例子中,doubleNum是一个 computed 属性,它依赖于num。当num的值发生变化时,doubleNum会自动重新计算;如果num的值不变,再次访问doubleNum时会直接返回缓存的结果,从而提高性能。
三、watch:监听数据变化
watch 用于监听响应式数据的变化,并在数据变化时执行相应的回调函数。它可以监听单个数据,也可以监听多个数据的变化。
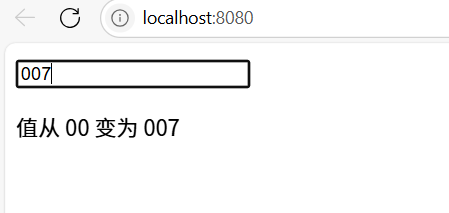
<template><div><input v-model="message" /><p>{{ logMessage }}</p></div>
</template><script setup>
import { ref, watch } from 'vue';
const message = ref('');
const logMessage = ref('');
watch(message, (newValue, oldValue) => {logMessage.value = `值从 ${oldValue} 变为 ${newValue}`;
});
</script>
在上述代码中,watch函数监听message的变化。当message的值改变时,回调函数会被触发,更新logMessage的值,从而在页面上显示数据变化的信息。
四、props 和 emit:父子组件通信的桥梁
1. props:父组件向子组件传递数据
props 用于父组件向子组件传递数据。子组件通过定义 props 来接收父组件传递的值。
父组件 Parent.vue:
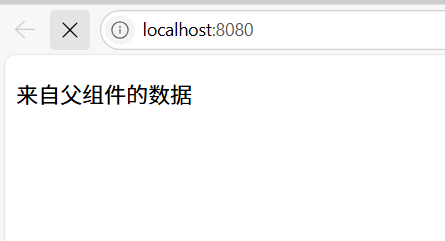
<template><div><Child :message="parentMessage" /></div>
</template><script setup>
import Child from './Child.vue';
const parentMessage = '来自父组件的数据';
</script>
子组件 Child.vue:
<template><div><p>{{ message }}</p></div>
</template><script setup>
defineProps({message: String
});
</script>
在这个例子中,父组件Parent.vue通过props将parentMessage传递给子组件Child.vue,子组件通过定义message属性接收并使用该数据。
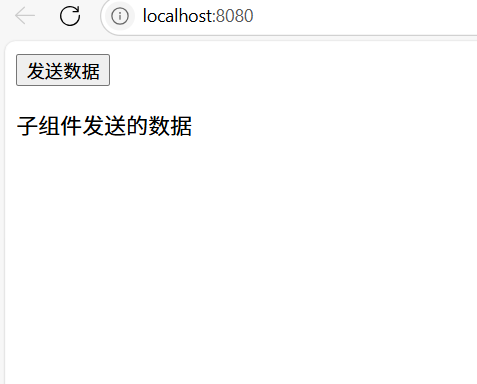
2. emit:子组件向父组件传递事件
emit 用于子组件向父组件传递事件和数据。子组件通过调用emit方法触发自定义事件,父组件通过监听该事件来接收数据。
子组件 Child.vue:
<template><div><button @click="sendDataToParent">发送数据</button></div>
</template><script setup>
import { defineEmits } from 'vue';
const emits = defineEmits(['dataSent']);
const sendDataToParent = () => {emits('dataSent', '子组件发送的数据');
};
</script>
父组件 Parent.vue:
<template><div><Child @dataSent="handleData" /><p>{{ receivedData }}</p></div>
</template><script setup>
import Child from './Child.vue';
const receivedData = ref('');
const handleData = (data) => {receivedData.value = data;
};
</script>
在这个例子中,子组件Child.vue通过emit触发dataSent事件,并传递数据;父组件Parent.vue通过监听dataSent事件,在handleData函数中接收并处理子组件传递的数据。
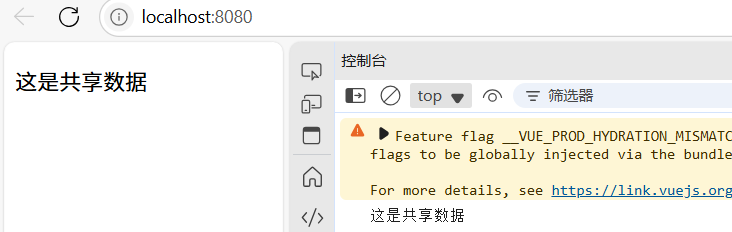
五、provide 和 inject:跨层级组件通信的利器
在大型应用中,经常会遇到跨层级组件通信的需求。如果使用 props 和 emit 进行多层级传递,会使代码变得繁琐。这时,provide和inject就派上用场了。
provide用于在祖先组件中提供数据,inject用于在后代组件中注入并使用这些数据。
祖先组件 Grandparent.vue:
<template><div><Child /></div>
</template><script setup>
import Child from './Child.vue';
import { provide } from 'vue';
const sharedData = '这是共享数据';
provide('sharedData', sharedData);
</script>
后代组件 Child.vue:
<template><div><p>{{ injectedData }}</p></div>
</template><script setup>
import { inject } from 'vue';
const injectedData = inject('sharedData');
console.log(injectedData);
</script>
在这个例子中,祖先组件Grandparent.vue通过provide提供sharedData,后代组件Child.vue通过inject注入并使用该数据,实现了跨层级的组件通信。
)

)


