功能说明
参考博文:https://blog.csdn.net/WZZ18191171661/article/details/99174861
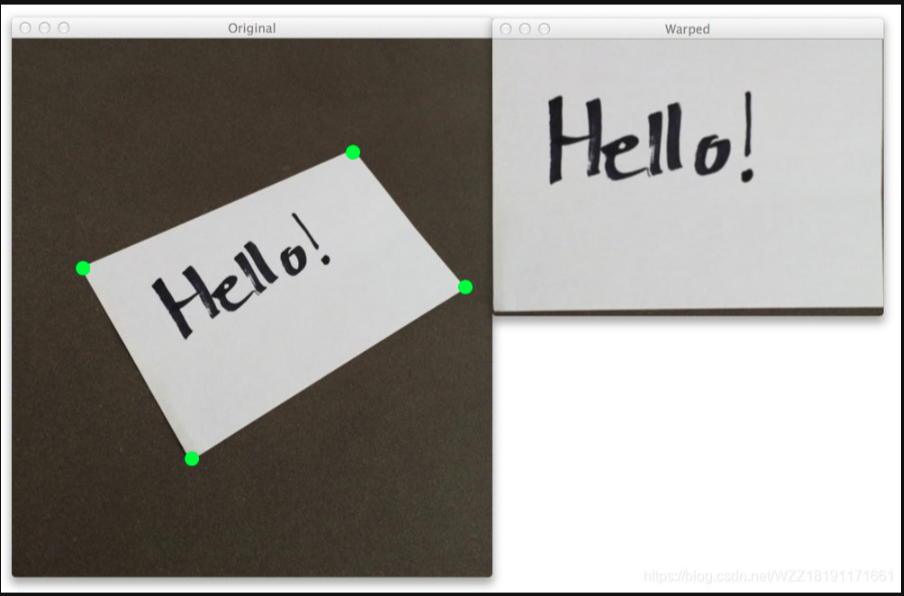
在处理现实生活中的图像处理问题时,我们经常会遇到一种情况-即我们将要处理的目标的位置是斜的,我们需要使用仿射变换进行矫正。当你做了很多现实场景中的案例之后,你就会发现这是一个非常通用的模块,因而本篇博客针对这个问题进行了详细的论述,具体的案例如下图所示,左边表示的是原始的输入图片,该图片中的目标是斜放的,我们要做的任务就是将其矫正过来。
 代码实现
代码实现
import cv2
import numpy as np
import time
from pyzbar.pyzbar import decodedef order_points(pts):# 初始化坐标点rect = np.zeros((4, 2), dtype = "float32")# 获取左上角和右下角坐标点s = pts.sum(axis = 1)rect[0] = pts[np.argmin(s)]rect[2] = pts[np.argmax(s)]# 分别计算左上角和右下角的离散差值diff = np.diff(pts, axis = 1)rect[1] = pts[np.argmin(diff)]rect[3] = pts[np.argmax(diff)]return rectdef four_point_transform(image, pts):rect = order_points(pts)(tl, tr, br, bl) = rectwidthA = np.sqrt(((br[0] - bl[0]) ** 2) + ((br[1] - bl[1]) ** 2))widthB = np.sqrt(((tr[0] - tl[0]) ** 2) + ((tr[1] - tl[1]) ** 2))maxWidth = max(int(widthA), int(widthB))# 计算新图片的高度值,选取垂直差值的最大值heightA = np.sqrt(((tr[0] - br[0]) ** 2) + ((tr[1] - br[1]) ** 2))heightB = np.sqrt(((tl[0] - bl[0]) ** 2) + ((tl[1] - bl[1]) ** 2))maxHeight = max(int(heightA), int(heightB))# # 构建新图片的4个坐标点dst = np.array([[0, 0],[maxWidth - 1, 0],[maxWidth - 1, maxHeight - 1],[0, maxHeight - 1]], dtype = "float32")M = cv2.getPerspectiveTransform(rect, dst)warped = cv2.warpPerspective(image, M, (maxWidth, maxHeight))return warpedif __name__ == '__main__':# img = cv2.imread("bar.jpg")img_path = '../picture_2025-04-09_14-56-03-518_ORI.png'img=cv2.imread(img_path)# 将图像转换为灰度图gray_image = cv2.cvtColor(img, cv2.COLOR_BGR2GRAY)box_small= [[1672,414],[2424,400],[2424,472],[1672,486]]print(type(box_small))box = np.array(box_small).astype(np.int32)for i in range(100):start_time = time.perf_counter()warped=four_point_transform(img, box)end_time = time.perf_counter()elapsed_time = (end_time - start_time)*1000print("从收图像到检测出结果回传结果用的时间!!!!!!!!!!: {} ms".format(elapsed_time))# cv2.polylines(img, [box], True, (0, 255, 0), 2)# print("绘制完成")# cv2.imwrite('E:/code/1.png',img)# cv2.imwrite('E:/code/2.png',warped)

)


