Foreword
VSCode CMake Debug 嵌入式MCU有好几种方案
Cortex-Debug
OpenOCD
https://elmagnifico.tech/2023/07/22/Vllink-DapLink-Debug/
OpenOCD,需要专门的调试工具,ST-Link或者这里的VLink,支持CMSIS-DAP的
增加而一个build做为前置任务,然后启动openodcd
tasks.json
{// See https://go.microsoft.com/fwlink/?LinkId=733558// for the documentation about the tasks.json format"version": "2.0.0","tasks": [{"label": "build","type": "shell","command": "make","args": [],"group": "build"},{"label": "download","type": "shell","command": "openocd","args": ["-f","cmsis-dap.cfg","-f","stm32h7x.cfg","-c","program build/stm32h7_demo.elf verify reset exit"],"group": "build"}]
}
launch.json 主要给openocd输入调试配置
{"version": "0.2.0","configurations": [{"cwd": "${workspaceRoot}","executable": "./build/stm32h7_demo.elf","name": "Debug Microcontroller","request": "launch","type": "cortex-debug","showDevDebugOutput": false,"servertype": "openocd","configFiles": ["cmsis-dap.cfg","stm32h7x.cfg"]}]
}
JLink
顾名思义JLink需要配合JLink来使用
需要注意JLink的对应路径也需要在环境变量里,否则可能调用不到
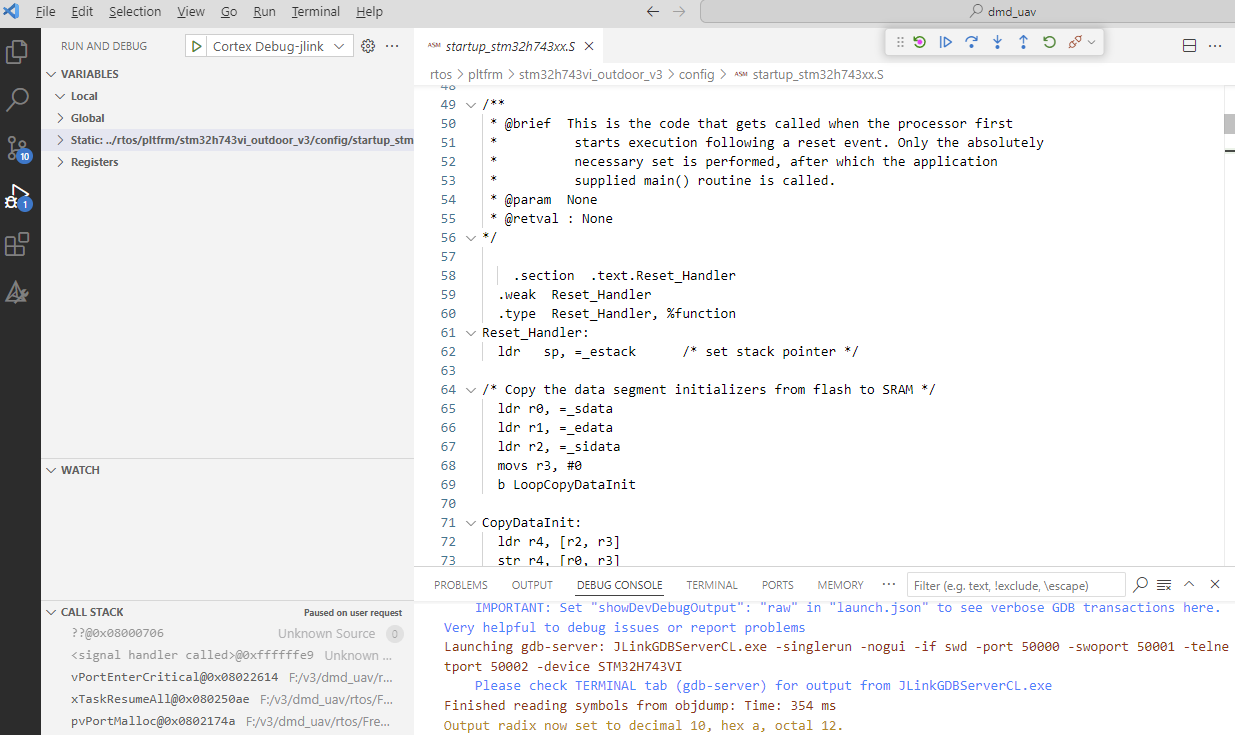
JLinkGDBServerCL.exe -singlerun -nogui -if swd -port 50000 -swoport 50001 -telnetport 50002 -device STM32H743VI
在VSCode里新建一个launch,主要是svd和elf路径,device填正确就行了
{"version": "0.2.0","configurations": [{"name": "Cortex Debug-jlink","cwd": "${workspaceRoot}/","executable": "${workspaceFolder}/build/bin/demo.elf","request": "launch","type": "cortex-debug","servertype": "jlink","device": "STM32H743VI","interface": "swd","runToEntryPoint": "main","showDevDebugTimestamps": true,"svdFile": "${workspaceRoot}/config/STM32H743.svd",// "preLaunchTask": "build",// "postDebugTask": "run"}]
}
通过VSCode这种方式调用,启动非常慢,和SES对比就拉跨
Embedded Tools
之前用过的一个插件
https://elmagnifico.tech/2022/03/15/Embedded-Software-Development-VS-VSC/
本质上还是调用gdb然后配合openocd来实现调试的
{"name": "Launch","type": "cppdbg","request": "launch","cwd": "${workspaceFolder}","program": "${workspaceFolder}/build/app/mxchip_azure_iot.elf","MIMode": "gdb","miDebuggerPath": "arm-none-eabi-gdb","miDebuggerServerAddress": "localhost:3333","debugServerPath": "openocd","debugServerArgs": "-f board/stm32f4discovery.cfg","serverStarted": "Listening on port .* for gdb connections","filterStderr": true,"stopAtConnect": true,"hardwareBreakpoints": {"require": true,"limit": 6},"preLaunchTask": "Flash","svdPath": "${workspaceFolder}/STM32F412.svd"}
Ozone
跳过VSCode,直接使用专业的Ozone来调试
https://elmagnifico.tech/2023/12/07/SES-Ozone-FreeRTOS/
配合我自己写的调用程序,很小30k,自动找到Ozone的路径,然后调用对应的调试文件,如果没有的话会自动新建一个
同样的烧写我也用了自己的程序去调用jlink完成烧写,比调用第三方插件可控性高多了
新建一个task,对应还有输入选择模板,否则一个配置要写一个task,太繁杂了
{"version": "2.0.0","tasks": [{"label": "Debug","type": "shell","command": "${workspaceFolder}/Ozone/flash.exe","args": ["--o","--path","${input:debugPath}"],"group": {"kind": "build","isDefault": false},"problemMatcher": [],"options": {"env": {"DEBUG_PATH": "${input:debugPath}"}}}],"inputs": [{"id": "debugPath","type": "pickString","description": "Select the debug configuration","options": ["${workspaceFolder}/Ozone/test.jdebug","${workspaceFolder}/Ozone/test2.jdebug","${workspaceFolder}/Ozone/test3.jdebug","${workspaceFolder}/Ozone/test4.jdebug",],"default": "${workspaceFolder}/Ozone/test.jdebug"}      ]
}
Summary
总体来说VSCode的调试不是很好用,还是原生的更好一些。
总感觉VSCode这里给的接口实在是太多了,选择太多了,但是每个选择其实做的都一般,没做到极致的水平
这些插件更像是一个整合工具,然后再接入另外一个整合工具,层层套娃,最后糊了一个勉强能用的东西
Quote
https://blog.csdn.net/pyt1234567890/article/details/122522700
https://blog.csdn.net/xiaoyuanwuhui/article/details/128085237
https://github.com/microsoft/vscode-cmake-tools/blob/main/docs/debug-launch.md


