随着web技术越来越成熟,就连QQ的windows客户端都用web技术来开发,所以在未来,web技术来开发windows桌面软件也会越来越多,所以在此发展驱动之下,将最近流程的python与web技术相结合,使用vue3和element-plus、vue-router、saas(CSS扩展语言),来开发桌面管理系统,也是一个不错的选择。最主要的是两者技术门槛比较低,而且开发效率也很快,同时也可以做出漂亮的界面。
一、技术背景
python:版本号为3.7(你也可以换成高版本,同样支持)
vue3:版本为3.4.29
element-plus:版本号:element-plus
vue-router:版本号为4.4.0
sass:1.53.0
操作系统为:windows10
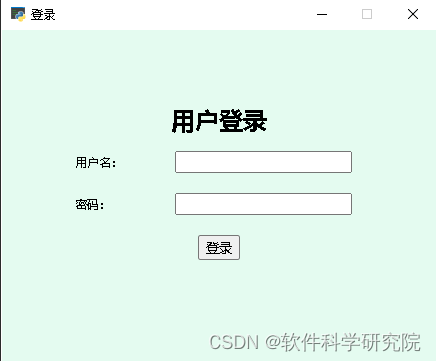
二、先看效果

三、web关键代码-登陆页面
<template><div class="login-container"><h1>用户登录</h1><form class="login-form"><div class="form-group"><label>用户名:</label><input type="text"  /></div><div class="form-group"><label>密码:</label><input type="password" /></div><button type="submit" @click="login">登录</button></form></div>
</template><script setup>
import {onMounted, getCurrentInstance,ref,computed} from "vue";
import {useStore} from "vuex";
const {proxy} = getCurrentInstance();
const login = async ()=>{window.pywebview.api.login('','')
}
</script>
<style lang="scss" scoped>
.login-container {max-width: 400px;margin: 0 auto;padding: 50px 20px;box-sizing: border-box;text-align: center;
}
.login-form {width: 80%;margin: 0 auto;
}
.form-group {margin-bottom: 20px;text-align: left;
}
label {display: inline-block;width: 100px;
}
</style>
四、web关键代码-首页
<template><el-table :data="tableData" style="width: 100%"><el-table-column prop="date" label="Date" width="180" /><el-table-column prop="name" label="Name" width="180" /><el-table-column prop="address" label="Address" /></el-table>
</template><script setup>import {onMounted, getCurrentInstance,ref,computed} from "vue";import {useStore} from "vuex";const {proxy} = getCurrentInstance();const tableData = [{date: '2016-05-03',name: 'Tom',address: 'No. 189, Grove St, Los Angeles',},{date: '2016-05-02',name: 'Tom',address: 'No. 189, Grove St, Los Angeles',},{date: '2016-05-04',name: 'Tom',address: 'No. 189, Grove St, Los Angeles',},{date: '2016-05-01',name: 'Tom',address: 'No. 189, Grove St, Los Angeles',},]
</script>
<style lang="scss" scoped></style>
五、pywebview关键代码
import webviewfrom controller.IndexController import IndexControllerclass Api():def destroy(self):window.destroy()def minimize(self):window.minimize()def login(self, username, password):print(username, ' ', password)main = IndexController(username)main.start()self.destroy()if __name__ == '__main__':api = Api()# js_api 获得 api 实例window = webview.create_window('登录', 'http://localhost:3004/#/login', js_api=api, resizable=False, width=450, frameless=False, shadow=True, height =670, background_color="#E4FBF0")webview.start()# webview.start(debug=True)
六、拿到代码执行如下命令
1、前端(必须先安装nodejs,百度自行先安装),进入到pywebview-desktop-app\web目录,执行如下命令,下载依赖
npm install2、运行前端(在目录pywebview-desktop-app\web下),执行如下命令
npm run dev3、启动python客户端,在pywebview-desktop-app\controller目录,运行LoginController.py文件
七、效果图如下

下载地址:链接:https://pan.baidu.com/s/1TH_UQx7sblW6O_6K6ZPqlA?pwd=thfk
提取码:thfk
)

)


